
Great news. We have a Zapier integration to offer you some automation in your life. If you're unfamiliar with Zapier, we suggest you watch this training video from their YouTube channel to get started!
Our two current integration automations are the following:
- New Review Zap: If a new review is published in ReviewTrackers, a Zap to the platform of your choice is made.
- Example: A new review is published to ReviewTrackers and a new Zendesk ticket (or your ticketing system) is created!
- Example: A new review is published to ReviewTrackers and a Slack message is sent re: the new review!
- New Email Request Zap: Discover your trigger in your preferred app or CRM (there are over 750 integrated with Zapier!) and Zap a Review Request or Feedback Request to your customer.
- Example: A new opportunity is closed in SalesForce (or your CRM) and a Review Request is automatically emailed to the closed customer.
- Example: A Zendesk ticket is closed and a Feedback Request is automatically sent to the customer.
Requirements:
- The person creating the Zaps must be a ReviewTrackers user in the platform.
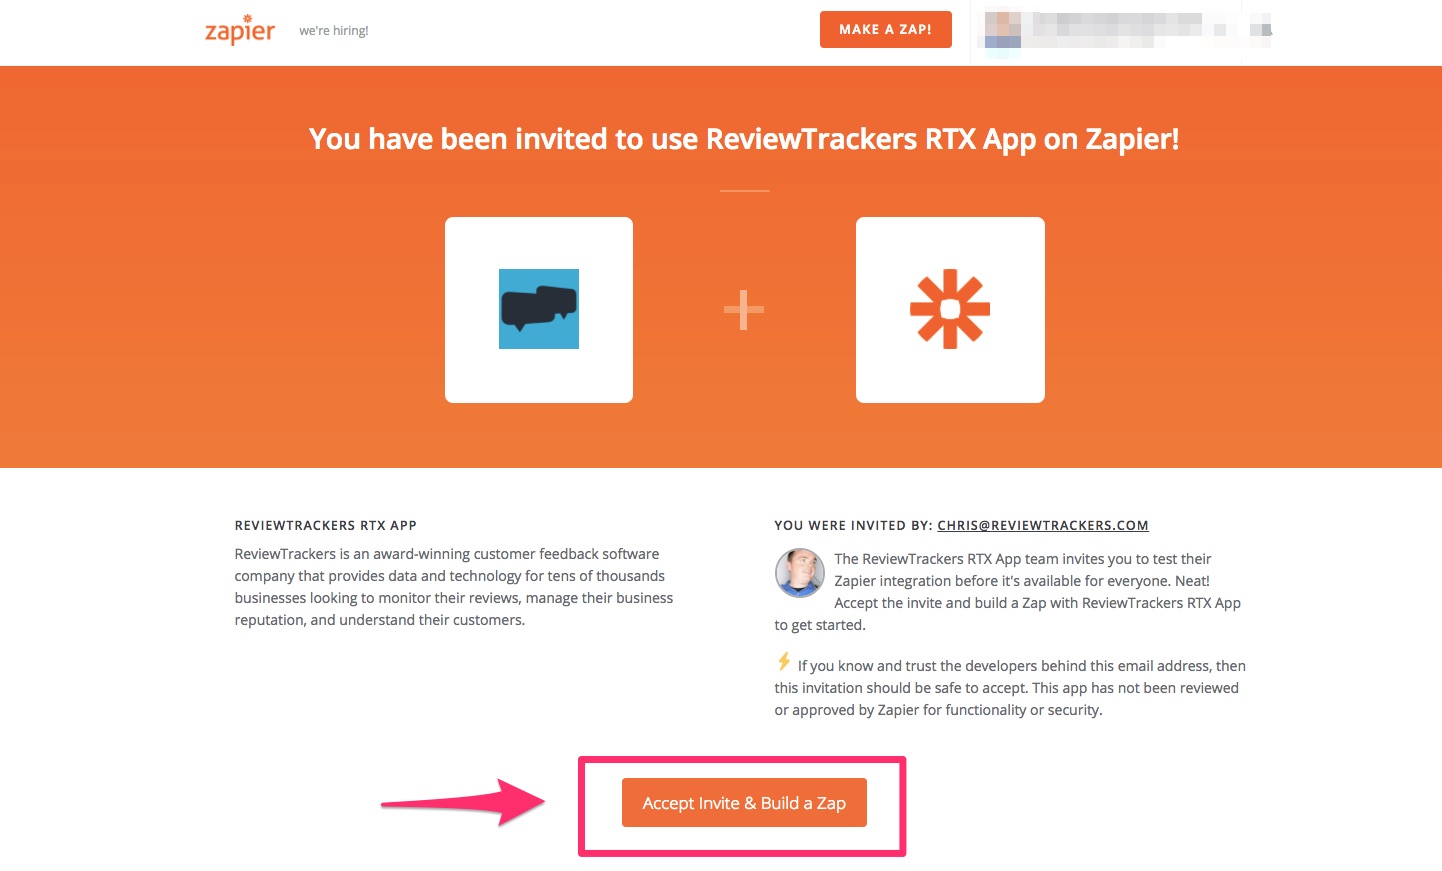
- You must use this link to integrate ReviewTrackers into your Zapier account: http://bit.ly/rtzap/. Click Accept Invite & Build a Zap to begin your ReviewTrackers automation.
Follow the steps below to create your zap!
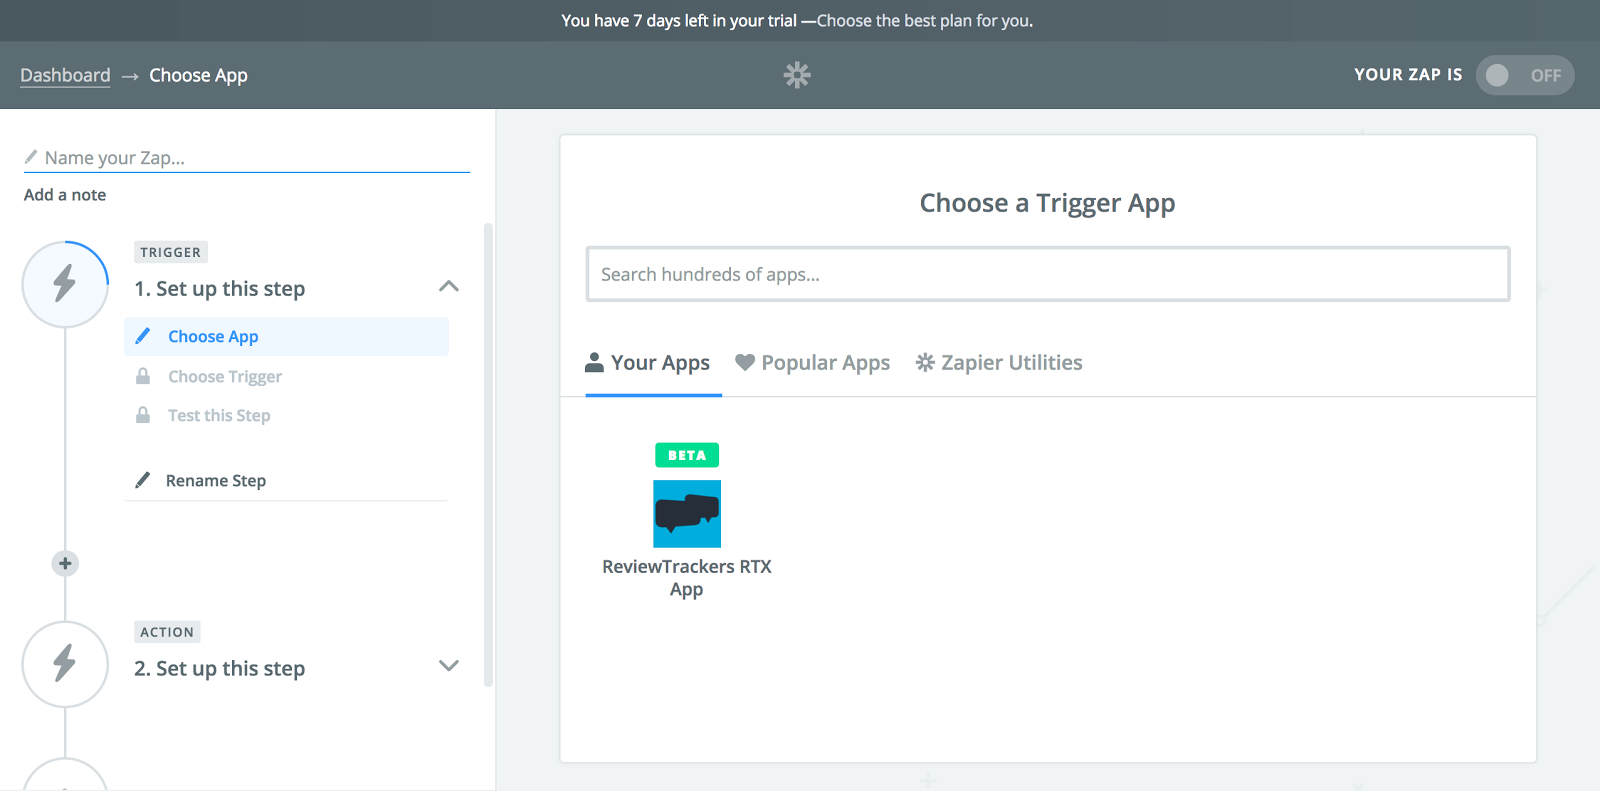
1. Connect your ReviewTrackers account to your Zapier account and choose the "Start Using ReviewTrackers now" button. Please note that you may be prompted to log into Zapier if you haven't already. (IMPORTANT: You must currently be a User in the platform).
2. Set up the first part of your Zap by going through the drop-down menus. (Note: For the sake of this article we're using Google Sheets to trigger a new review request. You can use other apps within their system as well as long as you have access to them).
- Choose the correct Google Sheets account you'll be pulling data from as well as which spreadsheet and worksheet you'll be inputting the data in.
3. Click the "Continue" button and then the "Skip" button when promoted to test the Zap.
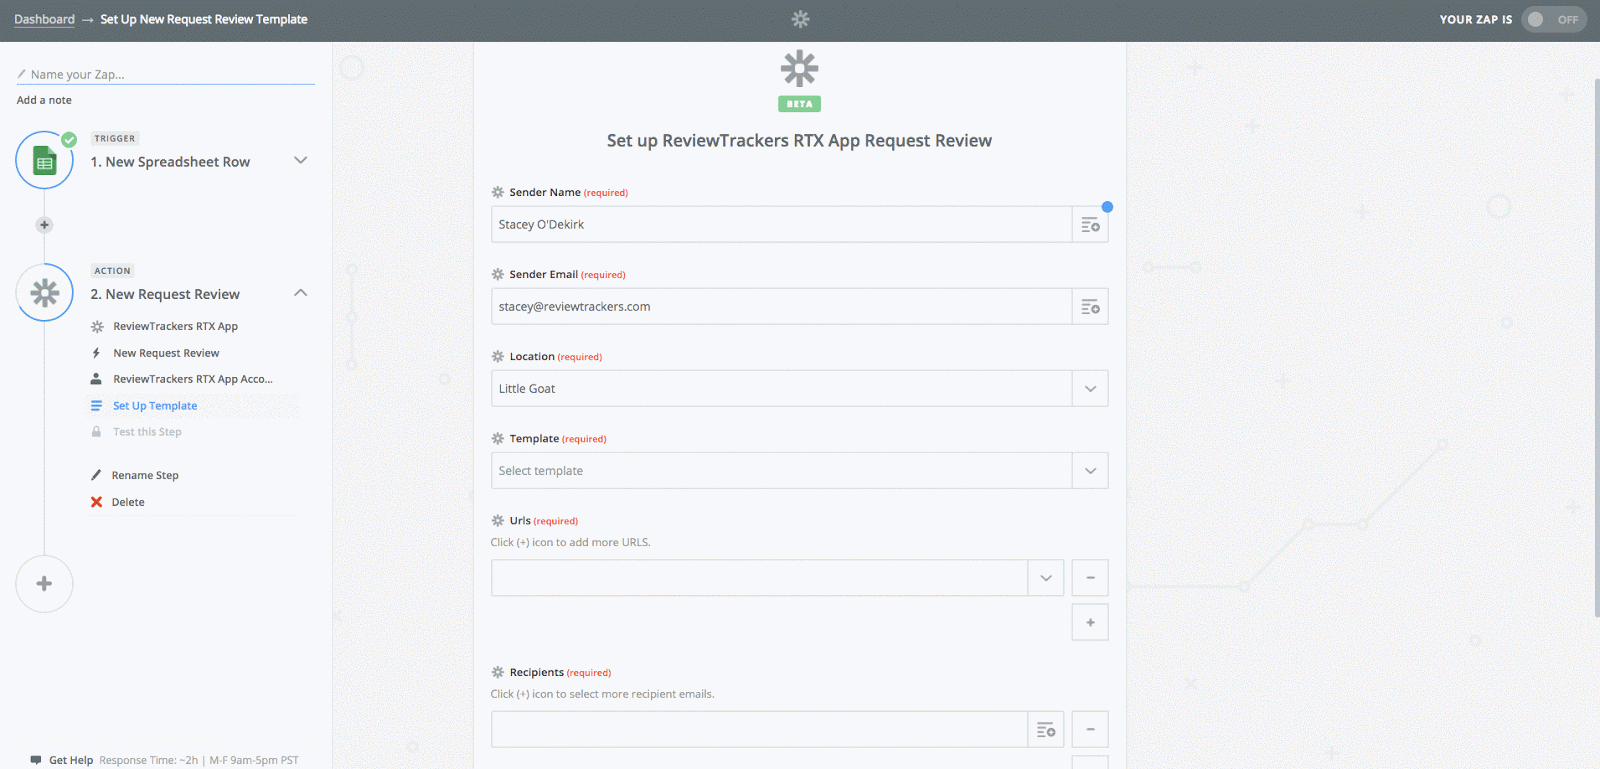
4. Search for the ReviewTrackers app in the search bar and select it. The "New Email Request" event should be the default option for your Action Event.

5. Make sure to select your ReviewTrackers account on in the next section and move on to your customization options.
6. Set up your request by adding:
- Sender name (if you want to change it)
- Sender email address (if you want to change it)
- Location you’re sending the Zap for
- If you are setting this up dynamically - use “Custom Value”. This is tied to the “External ID” you can find in the ReviewTrackers locations settings page.
- What template you want to use (if you have a jazzed up template, this is your chance to send it!).
- Three sources you are requesting reviews for
- If you are using a feedback request template - this is optional.
- If you select “Smart Suggest” we’ll pick the three sources for you!
- Where to find your recipients from your trigger.
7. Click Create & Continue when the previous step is completed:
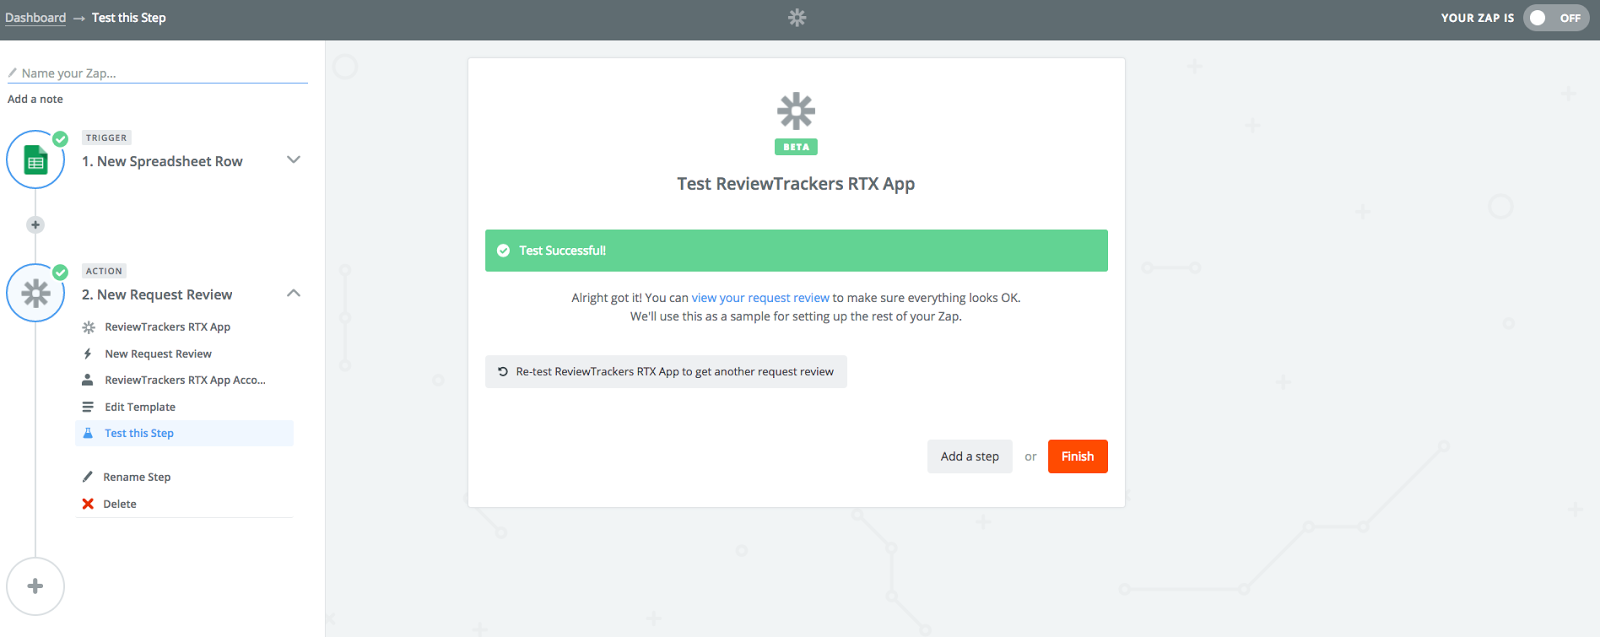
8. Click Finish.
You’re almost finished!
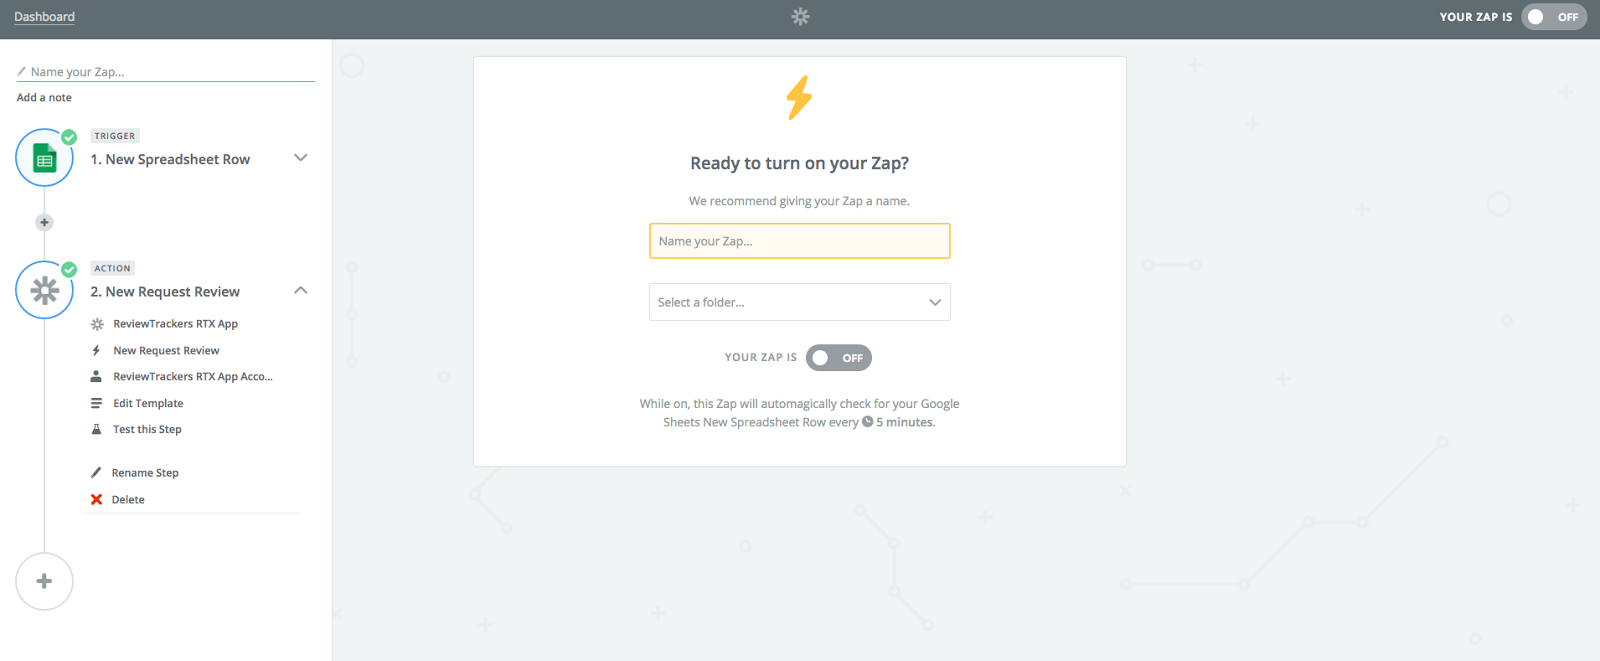
Name your Zap, and to stay organized, put it in a folder!
Flip the switch to activate your Zap! You’re all set for automation.
Please keep in mind, this is just one of many ways to Trigger and Zap between Zapier and ReviewTrackers. There are over 750 apps within Zapier to be specific. Only you and your team will best understand your internal workflow, the apps, and platforms you utilize, and how to automate and integrate them together. Happy Zapping!
If you run into any roadblocks or have questions along the way, email support@reviewtrackers.com and we’ll be happy to help.